Pages

Showing posts with label How To. Show all posts

Monday, August 22, 2011

Weekend Look: My Friends Bdays!

Hi Guys!

This weekend my friends and I went out to celebrate two of their birthdays and to watch one of their boyfriends band play. Its been a loooong time since we all got together and just hung out and have a few drinks, and it was sooooo fun! I paid the price the next morning.. eeks! still feeling a little drabby =( But anyways, I took a quick photo right before I left for the night. It wasnt an all out makeup look, just a light grayish smoky eye with glitter and blue liner =)


Oops! I got one of the glitters on my lid!

Face
Dior Airflash Foundation
Dior Nude Concealer
Dior Nude Powder
Tarte 12 Hour Amazonian Clay Blush 'Tipsy'

Eyes
UD Primer Potion
UD 15 Yr Anniversary Shadow 'Ace' (lashline up to crease)
UD 24/7 Eyeliner 'Zero' (upper waterline)
UD 24/7 Eyeliner 'Binge' (lower lashline and waterline)
UD 15 Yr Anniversary Shadow 'Evidence' (lower lashline)
NYX Candy Glitter Eyeliner 'Lavendar' (upper lashline)
Covergirl Lash Blast Volume Blasting Mascara 'Black'

Lips
VS Pro FX Lip Scrub Lip Balm
MAC Plushglass 'Bubble Tea'


Sorry the lighting kind of sucks, but since it was at night anyways, its probably really close to what it actually looked like. My hair, I had two braids, one on each side of my head, and I tied them together in the back. Kind of bohemian like.. I just wore my favorite black and white feather earrings, a loose grey slub top with a pocket, and some black skinny jeans with silver flats =) Didnt remember to take a photo of the entire outfit and look, but hopefully next time I wont be in such a rush =))

Wednesday, August 17, 2011

UD 15 Year Anniversary Shadows: Bronze Beauty Recreate


Every Monday, my friends and I get together at our place for dinner, and this past Monday we decided to have a poolside BBQ! Sooo... I was watching Michelle Phan's Bronze Beauty Video and thought... Hey! I can recreate this look using the UD 15 Year Anniversary shadows! It took me less than 10 minutes! I tried it out and heres the result!

What did I use?
  • UD 15 Year - 'Flow' (entire lid)
  • UD 15 Year - 'Chase' (outer corner/lower lashline)
  • UD 15 Year - 'Deeper' (crease)
  • UD 15 Year - 'Midnight 15' (brow bone/inner corner)
  • UD 15 Year - 'M.I.A.' (outer lower lashline/outer upper lashline)
  • UD 24/7 Eyeliner - 'Baked' (lower waterline)
  • UD 24/7 Eyeliner - 'Perversion' (upper waterline)
  • Covergirl Lashblast Volume Mascara

Friday, May 20, 2011

Latest Work: Kylee and JFD Photography!

Model: Kylee Cunningham Photographer: JFD Photography
Again I had the pleasure to work with Joe from JFD Photography before he left the islands on another adventure around the United States. This time, the model was Kylee, who was born and raised on the Big Island and living on Oahu studying to become a nurse! Kylee was so fun and bubbly, very free spirited and so bright! She has an amazing face and with her personality I really see her going places!

We did two different shoots, but for this particular one, we did a very smoldering brown look to really compliment her eye shape and intensify her eye color! For the hair, we did curls that had more separation, boho style! Joe was so fantastic and really brought out different vibes through the lense with just this one look! Heres a peek!


Model: Kylee Cunningham Photographer: JFD Photography

Eyes
  • Too Faced Shadow Insurance
  • MUD E/S: Spanish Gold, Espresso, Onyx
  • e.l.f. Mineral E/S: Wild, Golden
  • MAC E/S: Cork, Wedge, Shroom
  • MAC Fluidline: Blacktrack
  • Urban Decay 24/7 Eyeliner: Zero
  • Maybelline WP Great Lash Mascara: Soft Black
  • Anastasia Brow Powder Duo: Brunette
Cheeks
  • mark. Just Pinched Tinted Cheek Color: Nude
  • MUD Powder Blush: Rose Petal, Soft Peach
  • Nars Bronzer: Laguna
  • Dior Shimmer Star Powder: Amber Diamond
Lips
  • Jack Black Intense Lip Therapy: Lemon and Chamomile
  • MUD Lipliner: Natural
  • Dior Rouge Lipstick: Rose Interview #434 (discontinued)
  • Dior Addict Ultra Gloss: #787 (discontinued)
Hair
  • Hot Tools 1" Curling Iron
  • Paul Mitchell 'Hot off the Press'
  • Love, Peace and Planet 'Totally Beachin'
  • Suave Professional Extra Hold Shaping and Finishing Spray


Model: Kylee Cunningham Photographer: JFD Photography
I know, I used a whole medley of eyeshadow colors on her just so I could get the right mix of colors and finishes =) You could certainly use different products to recreate this look, and especially for the lipcolors because those are both discontinued from Dior, to acheive that pinky plum color =)))


Friday, May 13, 2011

Color Me Edgy... ft. Phantogram

I havent posted a work photo for sometime now, but I decided to post this one in particular because it reminded me of one of my favorite duos right now, Phantogram. Also, I said that I would do a look with the MAC Lipstick 'Candy Yum-Yum' so as promised I used it for this shoot, but with a twist =)

I got to work with model Gabi who came to Hawaii all the way from Hungary! She was so cute and tiny, but in front of a camera she was striking and fierce! Joe from JFD Photography was amazing as always with his unique eye, all the while cracking jokes the entire time. Gabi is originally a blonde but Joe, with his bangs obsession had Gabi wear this black wig, which totally changed her entire look from being soft and sexy, to edgy and strong! It really worked perfectly with the colors =)


Model: Gabi Photographer: JFD Photography

Eyes
  • MUFE Shadows: Yellow 2, Tangerine 18, and Fuchsia 26 (matte)
  • MAC Fluidline: Blacktrack
  • Urban Decay 24/7 Eyeliner Pencil: Midnight Cowboy
  • Maybelline Greatlash Mascara
  • Anastasia Brow Powder Duo: Brunette (darker color)
  • MUFE Lashes: Carolyn (I think, Joe brought them from NY)
Face and Cheeks
  • MUD Cream Foundation: YG1 and YG2 Mixed
  • MUD Face Primer
  • MAC Studio Sculpt Concealer: NW25
  • mark. Mattenificent Face Powder: Buff/Natural
  • mark. Just Pinched Cheek Tint: Peachy
  • Nars Bronzer: Laguna
  • Dior Shimmer Star: Amber Diamond
Lips
  • Jack Black Intense Lip Therapy: Lemon and Chamomile
  • NYX Lipliner Pencil: Fuchsia
  • MAC Lipstick: Candy Yum-Yum mixed with Cream Cup


The black hair mixed with the pink against a white background worked really well and made the colors pop! Love the way this photo was taken with lots of white space and her face off to the side, one of my favorite photos so far! Thanks Gabi and Joe!

Wednesday, April 27, 2011

Prom Special: Tips and Tricks!

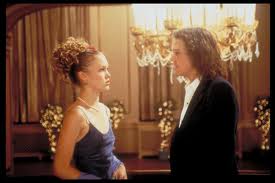
Prom the Movie
It is supposed to be 'Wanted Wednesdays' here at MakeupbyJanalyn but I ended up making a bunch of unexpected purchases at MAC on Monday because I needed some things for a specific photoshoot I did yesterday and a couple of prom makeovers for this Saturday (I like to give my prom goers a lipgloss to take with them). So... instead of 'Wanted Wednesdays' I decided I wanted to give a few pointers on prom makeup since it is the middle of prom season!! Plus, some of my favorite prom scenes from movies of the past and present =))

    
    Twilight
    
  • Get your brows professionally done. If you havent gotten your eyebrows shaped by a professional before, this is definetly the perfect time to do so. Brows make a huge difference in pulling your look together. They shape your face and add definition to your eyes. But, be sure to do this a few days ahead of time so you can avoid any redness or irritation, and then pluck stray hairs the night before if necessary.
Never Been Kissed
  • Prep your skin the day/night before. Exfoliate your face the night before (St. Ives Apricot Scrub is great) so your foundation will go on smoother. If you have really dry lips, apply a lipbalm at night and that morning to avoid any cracking or chapping.
  • Shes All That
  • Its ok to use colors! Prom is supposed to be fun! Your still youthful so you can pull off wearing bright colors on your eyes. I know one of the number one rules for makeup is never to have your makeup too matchy-matchy with your outfit, but I feel like prom is an exception to the rule. If your accessories are neutral and your hair is out of your face, you can still look polished and classy. But always remember, if you go colorful on the eyes, tone it done on the lips, and vice versa.
  • 
    10 Things I Hate About You
    
  • Dont go heavy on the foundation. You want your skin to look as natural as possible. Its prom, not your wedding. If your foundation is too caked on, it will make you appear older, and I am sure your date wouldnt want to look like he went to prom with his mother. Keep it fresh and light. If you have problems with acne, dont worry, your makeup doesnt have to be heavy in order to conceal blemishes.
  • 
    American Pie
    
  • Bring a small touchup kit. If you know your going to be dancing the night away, or you have oily skin, take some blotting papers. They are compact and small enough to fit in a clutch. Also, bring some tinted lipgloss. If you are eating and drinking (non-alcoholic beverages of course) before picture taking time, you want to easily be able to slap on some color right before its time to snap that photo.
  • 
    Grease
    
  • Use waterproof mascara and eyeliner. You dont want to look back at your prom photos and see raccoon eyes! Your going to be wearing your makeup for a considerable amount of time while your dancing, laughing, chatting with friends and possible going to an after party, so using waterproof mascara (false lashes are best) and eyeliner is a must to keep your look pulled together.

Napolean Dynamite

Alright ladies!! That's all I got on tips to help you avoid any boo-boos during your prom!! Now go out and have funnnnn!!!

Any other tips you want to share? or stories from your own prom? Photos? I would love to hear about it =)

Monday, April 18, 2011

How To: Basics of Contouring Cheeks

Model Justine Stevens, Photographer: Marlowe Holt, MUA: MakeupbyJanalyn (actual photo from my final photoshoot at Bella Torre Academy)

Contouring is probably one of the most difficult techniques to perfect (I still practice contouring) but its one of the most important, especially for fashion makeup!

I helped out the Bella Torre Academy graduating class recently with their final exam (not sure if Im allowed to say what the exam is, so I wont spill the beans!). But anyways they needed to apply all the techniques and theory they learned in class throughout the entire course. I found that they needed some pointers on contouring, so I was happy to share my tips and tricks with them.

As a disclosure, all makeup artists use different techniques, tools and products for contouring, and there are many different ways to contour, but this is just one of the easiest ways I know and a great way to practice. Later on, you can experiment and even make up your own way or what works for you. There are NO RULES in makeup artistry!

In the words of the Black Eyed Peas..."Lets get it started!"


Tools/Products You Will Need:
  • Contour Brush, Blush Brush or Small Duo Fibre Brush (any one will work)
  • Kabuki Brush (or any brush you would use to buff out product)
  • Powder Bronzer (Nars 'Laguna' is my fav!)
  • Good lighting!
First Step: Analyze.
  • Of course, you always want to analyze before doing any makeup, especially contouring. Placement is key to this particular technique.
  • Feel for the cheekbone. The cheekbone will usually run from the ear down to the apples of the cheeks.
Second Step: Apply.
  • Now that you know exactly where the cheekbone is, you want to apply bronzer to the hollows of your cheekbone, which is that soft area right below the cheekbone.
  • Start from the outside (base of ear) and work your way in (towards below apples of cheeks) in a straight, slightly diagonal line (everyones face structure will be different) using light strokes
Third Step: Buff.
  • Just like with eyeshadow, you usually dont want any harsh lines, but a gradient effect.
  • Take a step back and see if you went too dark in any areas or if it travelled to places you didnt want it. Buff it out.
TADA! Pretty simple right? 'Perfect Practice, Makes Perfect'!


Model: Kaitlyn Metcalf, Photographer: Steve Dantzig, Swimsuit: Blue Nalu, Jewelry: Jane Metcalf 'JAM Designs', MUA: MakeupbyJanalyn


Contouring is such a great technique to learn, and once you get comfortable with it you can really create a wide variety of looks, characters, and even change the appearance of your facial structure!

Do you have any tips, tricks, products or tools you use for contouring?

Monday, April 11, 2011

How To: Elegant Golds


Model: Danielle Woods, Photographer: Kolohe Photo, MUA/Hair: MakeupbyJanalyn, Jewelry: Larisa Woltag

This particular shoot was all about Gold, as you can probably tell.. so to compliment Danielles beautiful dress and flower necklace, I did a very subtle golden bronze look that would brighten her eyes a bit. We wanted to keep her brows light to keep the look soft and more youthful (shes not even in HS yet!) and she is soooo talll! I actually had to stand on the stairs to do her hair! LOL

 If you want to know the scoop on this look, keep reading!!


Model: Danielle Woods, Photographer: Kolohe Photo, MUA/Hair: MakeupbyJanalyn, Jewelry: Larisa Woltag

Eyes:
  • Apply MAC Paintpot in 'Let Me Pop' (limited edition, sorry!) all over the lid and right over the crease
  • Pat on MAC Eyeshadow in 'Goldmine' onto the entire lid
  • Diffuse the gold with MAC Eyeshadow in 'Tempting' by applying it on the outer 'V' and blending it inwards on the lid to blend in the 'Goldmine'
  • Take MUD Eyeshadow in 'Spanish Gold' and lightly blend into the crease moving up towards the brow bone
  • Get a nude matte eyeshadow and apply it right under the brow, blending it into the 'Spanish Gold', I used a mixture of MUD Eyeshadows in 'Bone' and 'Wheat'
  • Tightline the upper waterline with MAC Kohl Eye Pencil in 'Smolder' (any soft black pencil would do, or even a gel liner)
  • Line upperlash line with a brown liner, Avon Glimmersticks WP Eyeliner in 'Chocolate Brown'
  • Apply glitter liner over the brown liner, NYX Candy Glitter Liner in 'Gold'
  • Line the lower lashline with MAC Eyeshadow in 'Tempting' with a pencil brush or smudge brush
  • Curl lashes and apply mascara, Lancome Eyelash Curler and  Maybelline Great Lash WP Mascara in 'Soft Black'
Lips:
  • Apply a lip balm or lip conditioner if you have dry lips, MAC Lip Conditioner SPF 15 + Lavender and then lightly blot to take away excess
  • Line lips with a neutral lip pencil, MUD Lip Liner in 'Natural'
  • Apply a matte lipstick in a pale pink shade, MAC Lipstick in 'Cream Cup'
  • Add a touch of gloss, MAC Cremesheen Glass in 'Fashion Scoop'
Cheeks:
  • Contour lightly with Nars Powder Bronzer in 'Laguna'
  • Apply a peachy pink blush onto the apples of the cheeks, MUD Powder Blush in 'Soft Peach' and 'Rose Petal'


Model: Danielle Woods, Photographer: Kolohe Photo, MUA/Hair: MakeupbyJanalyn, Jewelry: Larisa Woltag

What are your favorite gold products?!


Wednesday, March 30, 2011

How To: Classic Red Lips


Red lips are always going to be a classic, but when applied the wrong way, it could lead to a disaster! Red lipstick or gloss tends to bleed, smudge, and just get all over the place if your not careful. These are some quick tips on how to acheive that perfect red lip!

  1. Exfoliate or moisturize. If you have really dry lips that peel or flake, exfoliate your lips before applying any products. If you dont have peeling or flaking, use a moisturizing lip balm or lip conditioner. Leave it on for a few minutes and then blot to remove any excess which could cause too much slip.
  2. Prime. After moisturizing your lips, use a lip primer all around your lip line. This will keep your lipcolor from bleeding.
  3. Line. You could either use a red lipliner, or a lipliner that mimics your natural lip color. Either way, both methods work great. Start by creating an 'X' on your cupids bow from the peak of your top lip. This will ensure that you wont go outside the lines. Then, start from the middle of your bottom lipline, with short steady strokes, work the liner out to the corners of the mouth and then up around to your top lip.
  4. Fill in lips. With your lipliner, fill the entire lip starting from the middle of your bottom lip outwards. Blend it all in with a lip brush. This will create a base that will grab your lipstick and keep it on longer.
  5. Lipstick. Take a stiff lip liner brush and your red lipstick. Using a lip brush will create nicer and neater lines. Start again from the middle of the bottom lip and work your way out towards the corners of your mouth and then around to the top lip. Really apply your lipstick well and in every nook and cranny because anything not covered will show. Blot any excess off lips with a tissue.
  6. Gloss. You dont have to do this last step, but if you want more of a modern glossy look, apply a red or clear lipgloss on top of the lipstick. Pat gloss on to the middle of your lips. This will create the illusion of a fuller and more plump lip. You could also take a highlighter of your choice and apply it to the cupids bow for added definition.
  7. Correct. If you went a little outside of the lines, thats ok. Just take a small concealer brush with your favorite concealer (cream works best) and erase any stray marks to really perfect your lip.
  8. The Finger Trick. To avoid any of your lipcolor from getting all over your teeth, do the finger trick! Take your index finger, stick it in your mouth, create an 'O' shape with your lips, and pull your finger out. This will wipe off any lipcolor that went too far inside your mouth. Be sure to wash your finger after!
There you go! The classic red lip! Not too difficult right? Perfect practice, makes perfect!

Products I would recommend:
  • Dior Gentle Exfoliant w/ Pure Lily Extract
  • MAC Lip Conditioner w/ SPF 15 plus Lavender
  • MAC Lip Primer
  • MUD Lipliner in Red (used on model)
  • MUD Lipstick in Lady Bug (orange based, used on model)
Credits:
  • Photographer: Marlowe Holt
  • Model: Justine Stevens

Tuesday, March 29, 2011

Get the Look: Natural Beauty w/ Tasha

Photobucket

The focus here is on the skin! People always assume that the 'natural' look is easy, but in reality, its the hardest look to acheive. The focus is mainly on the skin, you want to perfect those imperfections. You also want to enhance your natural beauty in the best way possible.

Heres how:
  • Step 1: Analyze your face. Locate any skin imperfections as wells as features you want to enhance.
  • Step 2: Moisturize your skin. You dont want your skin dehydrated because it will show through the makeup.
  • Step 3: Conceal. Locate any blemishes that need covering up. If you have redness use a yellow/green tinted concealer thats more of a cream texture. If you have dark circles, use a concealer that is more liquid form and thats orange tinted. Another option would be a concealer that reflects light (use this only if you dont have bags or puffiness)
  • Step 4: Primer. Always use a primer before applying foundation. It will even out the skintone, smooth your skin, and make it easier for your foundation to not streak.
  • Step 5: Foundation. Start from the middle and work your way out using downward strokes. If you have a pretty even skintone, you dont need to apply foundation to the entire face, just use where its needed. You could also opt to use a tinted moisturizer.
  • Step 6: Eyes. Apply any excess foundation to the lid. For colors, you dont have to use color at all, but for Tasha, I chose a dark blue eyeshadow because her eyes are brown since blue enhances brown. For green eyes, use a dark purple. For blue eyes, use a dark brown.
  • Step 7: Powder. Apply a translucent, matifying powder all over the face to set your foundation and help eliminate shine.
  • Step 8: Brows. Use a brow color that matches the color of the roots of your hair and follow your natural brow structure. I would recommend using a powder form for this look because a pencil might come out a bit too harsh.
  • Step 9: Lashes. Curl your lashes and apply mascara. You could apply it to your bottom lashes as well but only if you really need it.
  • Step 10: Prep lips. Use a primer or lip balm on your lips to smooth out fine lines and wrinkles and to moisturize.
  • Step 11: Lipstick or Lipgloss. Apply a beige or pinky beige lipstick or lipgloss to your lips.
Thats it! Now your done! I know, kind of a lot of steps but once you get the hang of it, you can acheive this look very quickly and look like you just woke up that way everyday!

Products I Would Recommend:

  • Moisturizer: Clinique Dramatically Different
  • Concealer: Benefit Boing (blemishes) Bobbi Brown 'Salmon' (undereye)
  • Primer: Smashbox Photo Finish Primer
  • Lip Primer: MAC Prep + Prime Lip
  • Lipstick: MAC 'Cream Cup'
  • Lipgloss: MAC 'Fashion Scoop'

Wednesday, January 26, 2011

How To: Basic Smoky Eye

Photobucket
Smoky eyes are the most common and widely used look for fashion and for a night out with the girls. There are many varieties and ways of creating a smoky eye effect, but I will give you my rendition of how to acheive a basic smoky eye using just a few products that you might already have in your makeup stash!

#1) You want to start with your eyes for this look. Since we are using dark shadows, there is the possiblity of having fallout under the eyes which will ruin your foundation.

#2) Prime the entire lid with a neutral color that is close to your skintone (you can use a cream concealer if thats what you prefer) this will ensure that your eyeshadow will not crease and will stay put longer.

#3) Take a black cream and apply it onto the lid up to the crease (it doesnt need to be perfect because you will blend it out later). I recommend using a concealer brush for cream products instead of bristle brushes so the application is smoother. If you do use a bristle brush, make sure its stiff, small, and thin so you dont get it all over.

#4) With a small eyeshadow brush apply black eyeshadow right on top of the black cream shadow. This will emphasize the color and seal the cream shadow.

#5) With a clean rounded dome brush or crease brush blend the black shadow up into the crease and just slightly over into the brow bone (be sure not to go too far up especially if you dont have a lot of lid space to work with).

#6) Take a matte neutral (or slightly lighter than your skintone) color eyeshadow and apply it with an eyeshadow brush to the brow bone just under the eyebrows. Blend into the black for a gradual rise in color effect (darker near the lash line getting lighter towards the brow bone).

#7) Tightline the upper and lower waterlines with a waterproof black pencil liner and also line the upper lashline getting as close to your lashes as possible.

#8) Taking a small angled liner brush, take that same black eyeshadow you used on the lid and smudge it across the lower lashline, this will also help to prevent the liner from running.

#9) This step is optional, but if you want to brighten the eyes a bit, you can use a shimmer white, silver, or gold eyeshadow in the inner corners of the eye using a small rounded dome brush.

#10) Curl lashes with an eyelash curler and coat with mascara or you can apply false lashes for a more dramatic look.

#11) Finish the eyes off by filling in your eyebrows following your natural shape with a brow pencil or eyeshadow. The golden rule for eyebrow color is to go two shades lighter if you have dark hair and two shades darker if you have light hair. You can use a wax or clear gel to set the eyebrows in place, but that is optional, only if you have some strays or untamed brows.

Suggestions to go with this look:
  • Pair it with a natural lipstick and/or gloss, try using a light beige or pink color
  • Cheeks should be neutral also since you want the emphasis on the eyes, try using a light pink or peach blush or even just a bronzer for daytime
  • For an added kick, you can use a blush with shimmer in it for a little glow or some sparkly lipgloss


Products I Would Recommend:
  • MAC Paintpot in Painterly or Urban Decay Primer Potion
  • MAC Paintpot in Blackground or Fluidline in Blacktrack
  • MUFE Aqua Eyes eyeliner to line eyes
  • Shu Uemura eyelash curler
  • Chanel Powder Blush in Tempting Beige
  • MAC Lipstick in Cream Cup
  • Loreal Voluminous Mascara